Somewhere along the line I acquired Prairie Dogs. At first it was one then two and now many years later it is eight. I always wanted to try to make sure they had adequate housing. The idea of just tossing them in some small cage or aquarium never appealed to me. The PDs get to run around the house a lot, but when we are not home I wanted something that would be cool for them to hang out in. Especially after leaving them home unattended and running free in the apartment I lived in, led to them chewing their way into my neighbor's apartment.
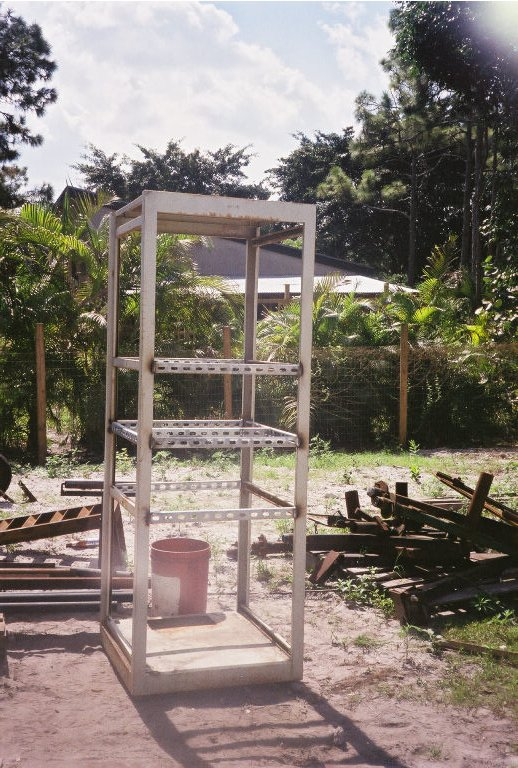
So I built a cage it was 6' long 3' wide and 4' high. It had two levels, bridges, and different trays filled with different items from sand to shavings. It was awesome. It was made of wood. Prairie Dogs are patient and will work very hard over a long period of time to achieve their objective. In this case, find a way to gain access to all the food stuffs the humans hide in the pantry and eat till their is no more food stuffs. The original cage was quite awesome and I posted the hand drawn images of it to the PD mailing list ( 1/24/00 messages #8371-8378). The PDs showed me every engineering flaw I had made.
The orginal wood around the door frames was 1x2 white pine. The same wood was used around the plexiglass as frames for the windows. Within one year I had replaced the base frame wood. Within two years I had reinforced the window frames with angle L metal. By the third year I had changed the base wood to double cedar and oak because it was a harder wood. The PDs had gotten so efficent at getting throught the white pine that I could replace it one day and they would be through it the next. I t wasn't fesiable to put metal on those parts because of the way the cage was designed. The hard wood did work.
The other problem was there was no specfic hiding chamber for them. While they had plenty of room, they didn't have a place they could hide. This is also important because PDs don't breed well in captivity. They really need a seperate chamber closed off from the open enviroment to be able to breed.
So after nearly six years of having PDs. I have had no succes with attempting to breed them. And with the current state of panic in the CDC over monkey pox, the only way I might be able to continue to have PDs is to get them to breed. Well about a year ago my dog broke the door on the PD cage. I was at this time tired of fixing it. I had done a design for a new cage but I hadn't had time to build it. And now that the cage was missing a door, I still didn't have time. The animals got transfered to a large metal ferret type cage as an interim place until I got time to build the new one. Well nine months, several states and a lot of other traveling later I had a small break come up. I was going to build the new cage. The reality of this was going to hit me like a sledgehammer.
Having a good design behind me, I needed the materials. I had some of the most important ones, two computer cabinets. The one I really lacked was money. My wife had helped. While I was on the road she kept putting aside some money so I could get the materials when I had time. Some of the materials I got from work. And no I didn't steal office supplies. With my line of work I was able to acquire some computer cabinets. These items were the base part of the design. I had them hanging around for a while as I tweaked out the design to my new PD cage on paper. The other was something strong that the PDs couldn't easily chew through. Well while watching one to many episodes of Monster House, Monster Garage, and American Chopper on the Discovery Channel the rest of it came to me. I had my final materials. I also thought I might be able to build it in the one week I was home. That was a very silly idea that didn't succeed. It took almost 2 weeks worth of work. The start date and the finish date were almost a month and a half apart. I really need to stop traveling so much for work. So the bulk of the time the cage sat in a half finished state.
So here is the final design. Those are zipped acrobat files.
Flaws with the old cage design taught me the following. Metal is good. Plexiglass is great if it is thick. And wood is bad. The sand in the drawer caused it to stick. I have to admit some of the old flaws came into the new cage. The big doors are still there. I like those. The problem with them is that when 8 PDs rush you they have more room to escape than you do to herd them. However I couldn't get past being so impersonal as to create a small slide tray to feed the PDs. It would seem like a prision food tray. So what if it takes 45 min in the morning to feed and herd PDs. It just sucks when I am late for work. I am always late for work.
Enough ranting let's go over the new cage.
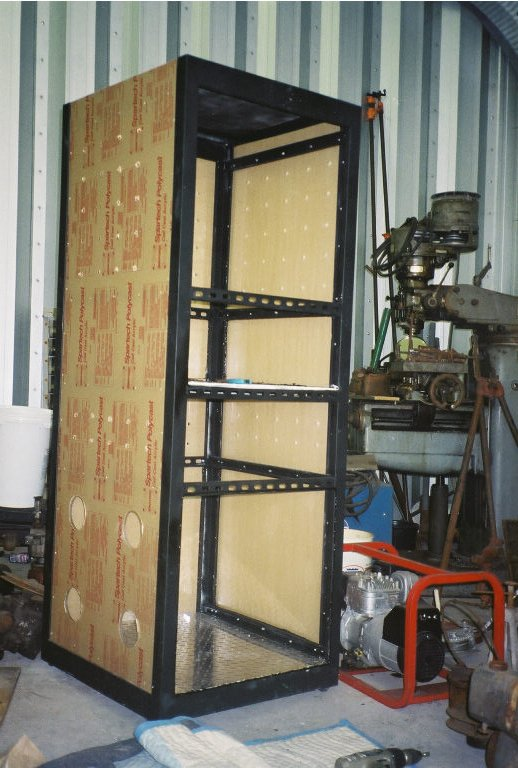
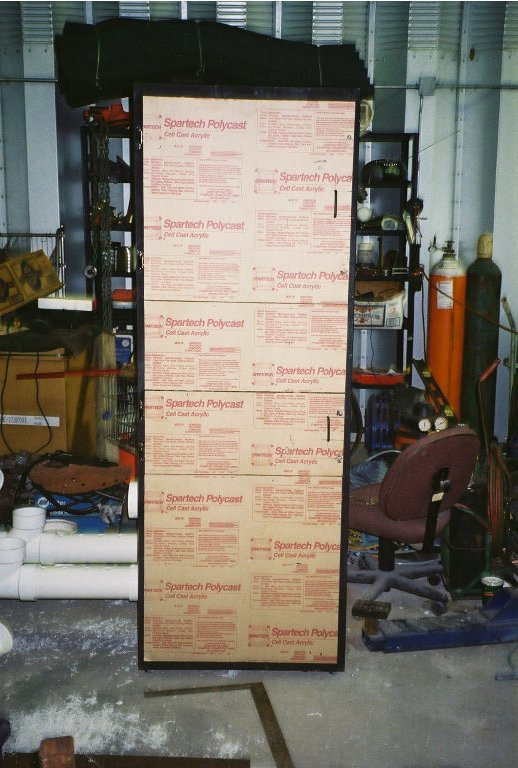
The two computer cabinets were fine in their basic design for what I needed and the price was right, free. I needed to add some unistrut for added support. I would need to have it welded. I do a lot of things, welding isn't one of them. So I found a welder. A real good one. He wasn't free but he was fair. Also he let me store my cabinets at his place while the construction was going on. Here is what it one of the cabinets look like just after welding.
After getting the support pieces welded. It was time for the diamond plate. I bought a large sheet of aluminum diamond plate form Eastern Metal Supply. They don't sell small sheets. And they aren't cheap. However they are less expensive than some places and the almunium isn't going to rust or corode as quickly. So with Tyler (welder) , we cut the sheets for the floor panels and the sandbox pieces. Welded the sandbox together and test fit the sand box and floor pieces.. Since the cabinets had been outside for a while there was a minor bit of coorosion on them. I sanded all that off and primed them with Kilz. Then painted the cabinets flat black.
After painting the cabinets it was time for the plexiglass. The plexiglass was a bit of an issue. I wanted it to be thick and somewhat scratch resistant. The problem was the size was a bit off. I needed it to be 73 inches tall. That was an inch taller than standard stock. That was the next issue. the size meant I had to get oversized plexiglass. That was going to be expensive. Out of all the stuff on this cage the Plexiglass hit the wallet the hardest. West Palm Beach Plastics did a great job, so I got my money's worth. They cut it to the right sizes and it all fit perfect the first time. The plexiglass was 3/8 inch thick with about 1/8 inch for the metal that supported it. I drilled the air holes and the pass through holes for the tunnels. I used a 1/2 inch drill bit for plexiglass for the air holes. I used a hole saw for the tunnels. The tunnels are 4 inch PVC. The hole saw I believe was 4.5 inches to accomodate the connectors. After drilling the holes it became time to secure the plexiglass to the frame. I went for 1/2 inch screws #6 the philps head had a tough time forming threads and didn't want crack the plexiglass. So I went back and got 1/2 inch long #6 hex head self taping screws. I had pre drilled all my holes for this so the plexiglass wouldn't crack. This is a time consuming process. However after it was done the cages started to take shape.
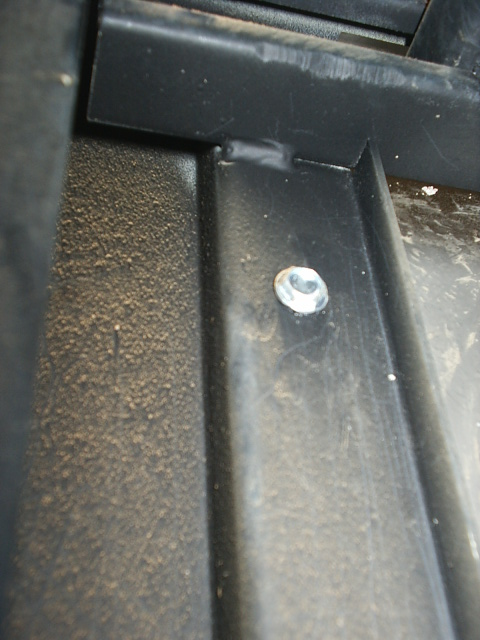

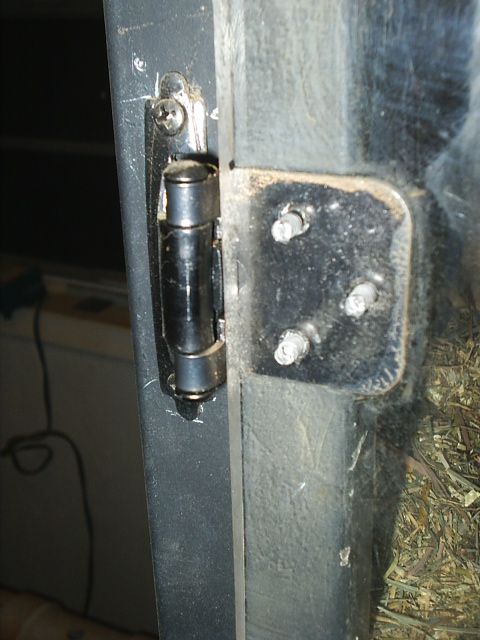
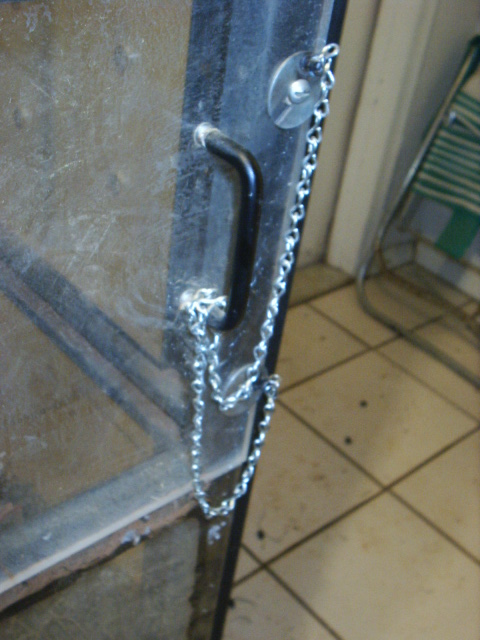
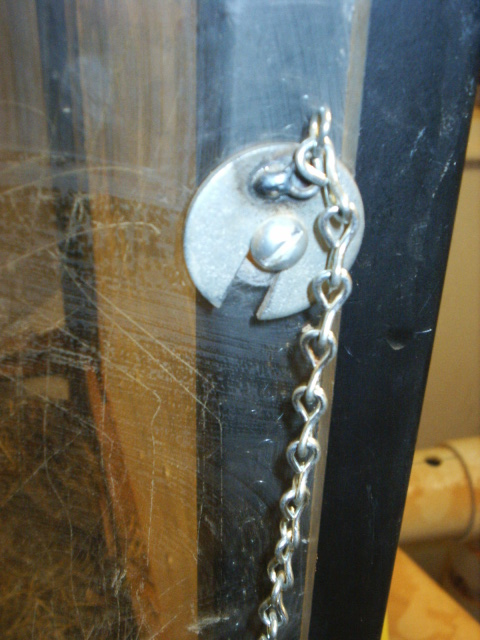
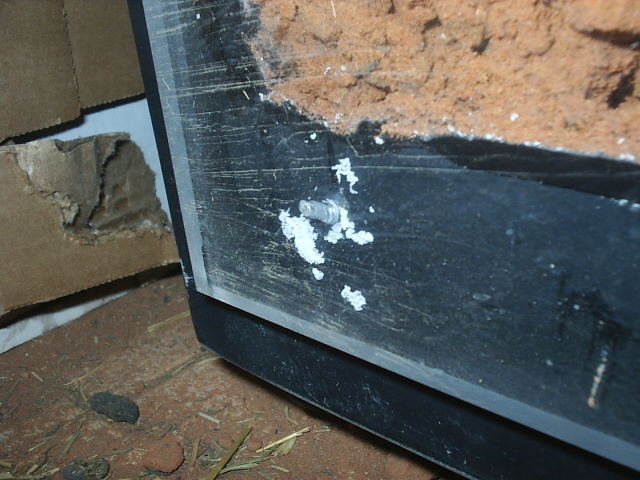
Then it came time for the doors. This was a bit of issue. Because the Plexiglass and the frame of the computer cabinets weren't going to work with european style hinges. I made a trip to the Home Depot. The hinges I wanted needed to reach in on the length of the door so they could support the weight of the door. It didn't have to reach far but at least 3/4 of inch in. They also had to maintain the same level from the underside of the plexiglass to the frame. After going through some of the huge collection of hinges. I found some. I don't recommend you basic or cheap hinges for this. I went for simple handles for the doors. Now keeping the doors closed was another fun issue. PDs are professional lock smiths and it they have access to tumblers, hasps or any part of the closing mechanisms, they will get out eventually. So I had to come up with a lock they couldn't touch that was actually functional. I took two 1/4-20 1.25 inch bolts and double nutted them. One on the inside of the frame and one on the outside, then used thread lock. The metal of the frame has a bend it it by design. So the PDs can't really reach it and the thread lock should prevent them from getting the nut loose. The head of the bolt stayed facing out. I drilled holes in the plexiglass that were just a little bigger than the head of the bolt. I set the level of the bottom of the head just about a 1/16 of an inch above the plexiglass. I then cut 1/4 inchfender washers with a slot up to the hole in the washer. That way I could slide the washer over the bolt up to the hole in the fender washer. The was had a piece of jack chain welded to it. The jack chain then runs to the handle on the door. 2 locks per door. I kept it pretty tight so if the PDs banged against the doors they couldn't vibrate the the washers loose. The chain were also slighty bent at the end of washer so it forced the washer up keeping it locked it place.
Now can one of the biggest changes I made to what you see on the plans. I switched the cages. The cage design on the right is now on the left and the cage on the left is now on the right. I did this becuase it fit around the window I was placing the cage next to better. So when you look at the photos remember I reversed it to what is on the plans.

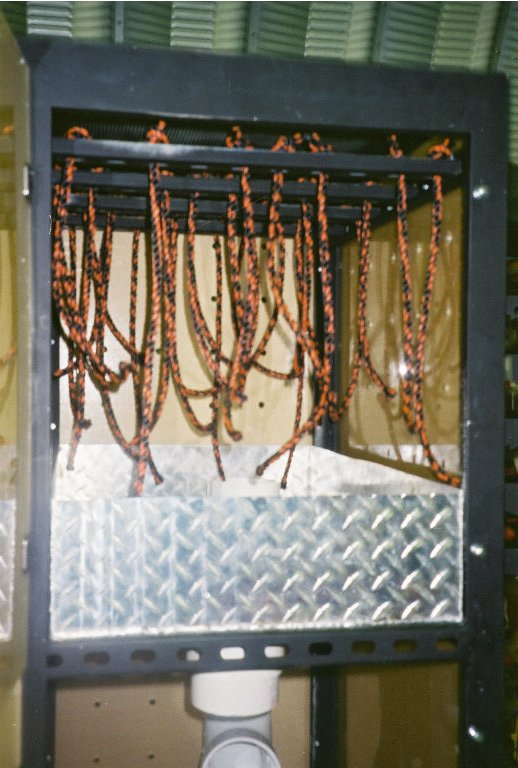
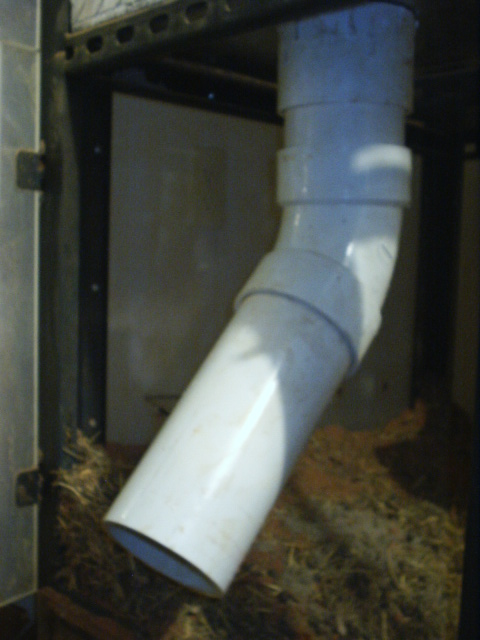
The cages were coming together, so it was time for the pipes that joined the cages and the levels within the cages. I used standard 4 inch plumbers PVC and fittings. The plans also don't show quite the detail that the photos do. Also I did not glue the pipes that joined the two cages together. I did glue the pipes that ran vertically so that they wouldn't come apart. There is one verticle fitting that didn't get glued. that is the cap on the underside of sandbox. The sandbox has a short pipe right at the front with a cap. The pipe was connected with a 4 inch male adapter to a 4 inch female adapter. Screwing them together with strap wrenches. I then cut the male fitting which was the one sticking up in the sandbox about a 1/4 inch above the bottom of the sandbox. I silconed around the base of the fitting to prevent sand from just falling through. A short piece of 4 inch PVC was placed in the female adapter and then a cap was placed over the bottom of the short piece. Then a seperate 45 degree fitting and a short sleeve were also made. This is so I can the sand by removing the cap and placing the 45 degree piece with the sleeve on it. and just guide the sand to the hole. Thus making sand cleaning and replacing much easier. Note this is Play Sand in the sandbox. Not the clay or dirt I use in the other part of the cage. You can see the short stub down in the next photos.

Next I put Silicon around the edges of the Plexiglass on the bottom and middle sections that were getting dirt. I didn't want it all over the floor.
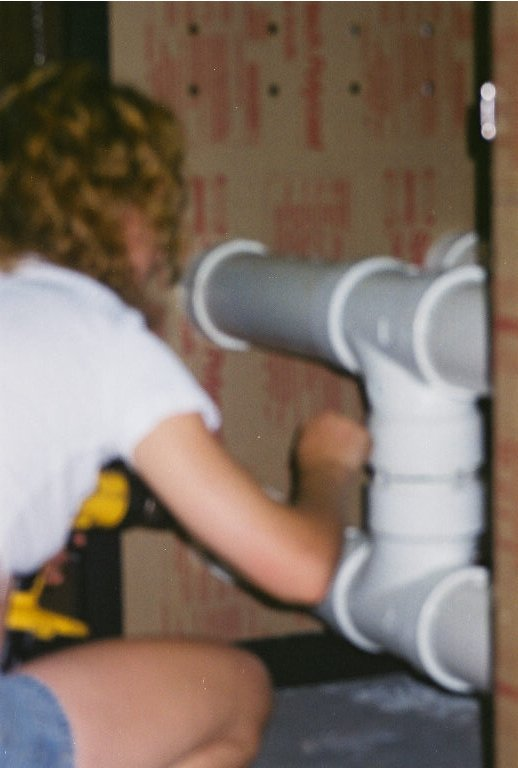
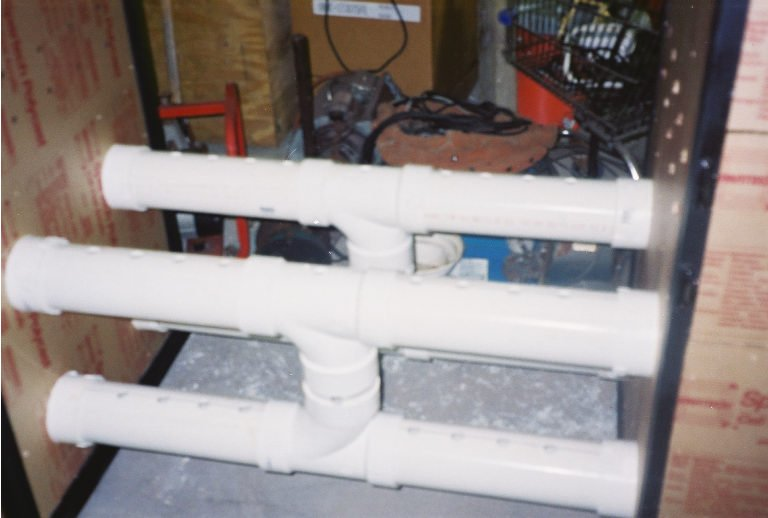
Now to get the pipes between the cages going. I used 4 inch male adapters with locknuts in the plexiglass. cut lenths of pipe to y fittings. Cut short pieces to join the verticle portions of the Y pieces together. I used my wife for cheap labor and had her drill holes in the top of the horizontial lengths of 4 inch PVC and a few holes in the Y fittings to maintain air flow.I put them in top side only. I didn't want dirt just falling on the floor. Sorry they are blurry.
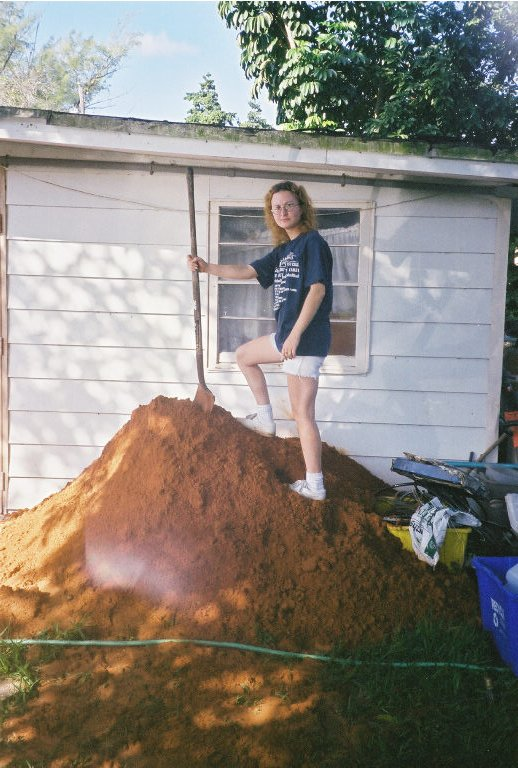
Now the dirt. The bottom section of the two cages (plus the middle of one cage) were to be filled with a dirt that the PDs could use to burrow in. Normal Florida dirt is basically sand so that wasn't going to work. The Palm Beach Zoo uses Georgia clay for it's PD exhibit. So I figured I would do the same thing. If I had a nickel for every landscape supplier who responded "in Georgia" , when asked, "Where could I get Georgia or red clay?" I would be paying someone else to write my webpages. I managed to find some at Bushel Stop. I bought 2 cu.yds. I loaded into the back of a rented pickup truck and learned with that kind of load I can easily serve the backend all over the road. That is a lot of dirt. Fortunatly when it comes to shoveling dirt, I have that wonderful cheap labor source, a wife. If you don't have one of these cheap labor sources at your ready I recommend you get one. Avoid the golddigger model as they are not a cheap labor source. Well I handed my wife a shovel, grabbed a beer and supervised.
Once the dirt was at the house I disassembled the cages for transportation from the welders to my house. Once move to the house they got put back together. The setup continued by loading the dirt into the bottom section of the two cages, then the middle of the one cage. The sand was placed in the sandbox. Food and water bottles were setup. The cage was ready and the PDs were migrated to the new abode. They freaked. This wasn't their home. They didn't know what to make of it. They spent the first evening kinda of feeling it out. Then like the good little beta testers they are, they proceded to show me every flaw in my new cage.
The first thing was the dirt. The type of dirt was fine. The PDs found out they could dig and went to town. Some notes on how PDs dig. They throw around a lot of dirt. They throw it high. Also they want to dig deep. Real deep. All the airholes were points for dirt to fly out of. They never missed an airhole. and once they discovered that the holes in the pipes would allow dirt easily on the floor. That is where a lot of the dirt moved to. The rest of the dirt got bunched up against the wall. So that if I opened the door, all the dirt would fall out. PD tunnels are big, they would dig one and the rest would cause it to collapse by trying to make it bigger.

The doors are still a problem , mostly by choice of design. I didn't want the doors to fit inside the frame because if the sand got inbetween it could make them extremly difficult to open. I should have however, place a small peace near the bottom with a piece of felt on it that would have acted as a broom to push dirt in as I closed the doors. Since the PDs push everything up against the door, when I open it hay and dirt floor on the floor. Which adds to the mess created by the PDs digging.
The middle section that has the diamond plate on top and bottom is hardly used. I have about two PDs who love it the rest avoid it. The cage has only been in play for a month and a half now, so that may change.

|
|
 Here is the article as a .pdf Here is the article as a .pdf |